|
|
 |
|
An interesting tip: diagnosis if you remove filler cap, and sight down it using a torch, you can inspect the condition of the forward drive cone, and the forward gear teeth. One customer had intermittent engagement in forward which could have been a disintegrating cone? Stuck in any gear? probably rust, probably water in the oil via failed water pump seal and probably blocked cooling circuit. Noisy in gear? probably same problem wrecked thrust bearings - evident by play in the output shaft of nore than 0.5mm fore-aft. Noisy in neutral - rust again, check oil, probably input shaft bearing Jumping out of gear - cones damaged - rust again? oil level rising/too high - probably water pumping in from failed pump seal - fix immediately.
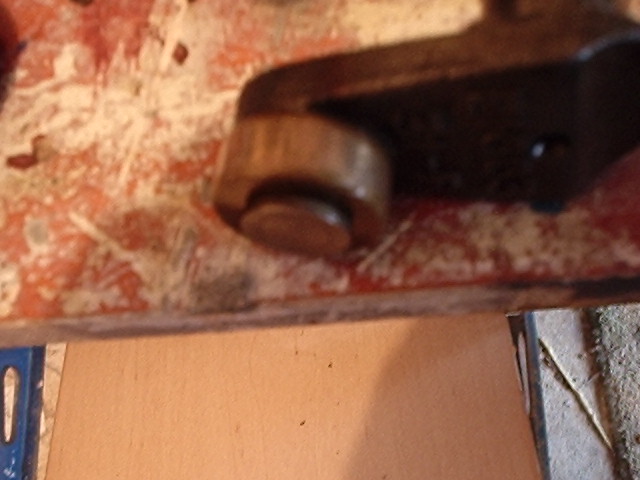
Stripping the gearbox is tricky, unless you know how - here you go! {having removed the engine, water pump pipe and drained off oil) remove propshaft flange with 24mm socket, locking the flange from rotating either in a vice, or by using a long bar against studs this one was a 'sod, and having rusted on badly, was removed after an hour of work using heat, impact socket, soaking in penetrating fluid, lossening with a lump hammer, and chisseling the nut round with a hammer when hot. I still could not budge it, so after soaking in WD40 for a month, took it round to the local tyre company, who used their big windy gun to get it off, which was a relief, then a 3-leg puller extracted the flange. All this was neccesary to inspect the taper-bearing on the output shaft which had felt less than smooth. Above, output shaft taper bearing had pitted while parked up for months, having ingress of water/air into box, the oil seal was compromised by the painted/rusted/rusty sleeve visible here, which also needed replacing.
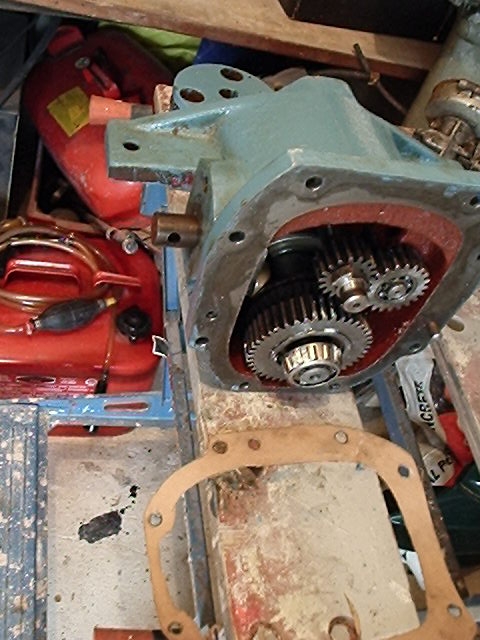
Above, the new parts for the output shaft; oil seal , seal , collar (contact me for spares) Stop press Summer 2006 - I have now sourced an upgraded collar to solve the rusting/leaking collar problems - it is a self-lubricating phosphor-bronze collar that is a push-fit - this means owners will be able to replace their leaking gearbox with an upgrade that will last without removing the gearbox, and rebuilders can use it again and again instead of having to replace it with the seal next rebuild. I reckon with two opposed chisel/screwdrivers in the removed seal cavity, you could lever off the old collar and change in situ now. now you can ....remove the water pump remove the three 8mm bolts, with a little tapping/levering, remove the casting, pull out the impeller (use a pair of screwdrivers if the woodruff key is tight on the impellor), remove the back plate, lever out the outer oil seal with a large screwdriver. Note it shoul have the inner lips facing aft.(preventing pumped water entering gear oil) tap the inner oil seal into the gearbox using drifts. Note that one should have the inner lips facing for(preventing oil escaping gearbox) imbetween the two seals is a drain hole down to allow seepage to drip into the bilges not enter the gear oil. Clear all the rust and crap that blocks this, uincluding paint on the outseide (exit hole is above output shaft). to remove the input shaft, output shaft, reverse shafts, here's a synopsis; input shaft this will pull out easily, with a little resistance to the water pump seals and impellor if still attached. reverse shaft this is just a single toothed wheel that taps out from behind, ther is no need to remove it. output shaft (the big one) to remove this, you have to first remove the input shaft, and then the gear lever has to be pulled rearwards to allow removal; this may be possible without removing the lever assembly, providing the oil filler bolt is removed? Clear the Water pump seepage hole, this allows pressurised water from the pump that has slipped past the outer seal to drain into the bilges instead of going straight past the inner seal into the gear oil (which has the oil seal valving' the wrong way for water ingress, but the right way for oil egress of course) Invariably, paint and rust clogged this hole years ago and was the likely cause of all gearbox failures! below you can see the overpaint
Above, the drain hole is so packed with rust it has to be drilled/reamed out. If you dont do this, the water pump will drip saltwater into the gearbox!! to remove lever (allowing mainshaft removal) drift out cotter pin/split pin from gear lever. this is difficult/impossible sometimes in the boat. use a drift/heat and puller, remove the lever. (the vire 7 gear lever is simpler than the 6 in that there is no sliding collar to service/go wrong)
with the lever removed or loose, the inner shifter can be rotated fully forward as the mainshaft is extracted.
above: the shifter removed for inspection after mainshaft installing the new inner OIL seal has to be with the lips facing the OIL
installing the outer WATER seal. with the lips facing the WATER (the two seals are identical part ) pack the outer seals spring with marine grease. I like to tap them in using a 12 sided socket selected to fit imbetween the inner and outer lips thus avoiding any damage. In the vire 7, there are two circlips that stop the seals being driven in too far and assist seating the seals square to the shaft, these are normally rusty and corrode to block the drain hole, i reccomend replacing them with rustless/stainless circlips if possible, but i couldnt find any.
Above, inserting a new output shaft seal (lips inward to OIL of course) To replace the output shaft taper bearing which commonly rusts badly, do the following tap out the woodruff key remove the collar (chisel/lever off and replace unless you already got my bronze upgrade) using a pair os screwdrivers, prize off the inner race with it's spacer tap on the new race with it's spacer replace collar tap in woodruff key perfectly flat with no burrs.
After tapping in new output shaft taper bearing, the mainshaft (with new taper race and collar) is installed by rotating back the shifter from a forward to a downward position
the layshaft/water pump shaft is now replaced with a wooden hammer tapping the end of shaft to re-seat the end race. Note the over painting will need removing with a blade before jointing to the engine block
Making the gasket Stage 1, a new sheet of gasket paper from the motorist shop has been cutout to allow shafts and peg to poke thru, then after my dirty fingers smoothed an outline round the edges, a small flat hammer taps away along the edge and an angle of about 30 degrees.
To make the holes, puncture with a sharp screwdriver, and either punch out (sized 1/4" socket onto flat hard surface e.g. flat part of the vice) or trim out with conical hand grinder is quicker and more accurate, clean debris away from holes etc afterward.
we finished the outside, but now the inside, similar smear the inner profile with a dirty finger-trace and tap away
WATER PUMP ASSEMBLY Note: it is just possible to replace impellor without removing prop shaft/flange. to do this, you have to turn flange so segment is clear or housing, and turn front pulley to rotate impellor ar you pull it's housing off to stbd. it's a tricky job but possible. If doing this in the boat, take a torch/mirror for inspection. having polished all the bronze parts, the water pump needs replacing. The output shaft is fitted with a woodruff key to engage the impellor, which is easy to damage in which case needle file are burrs to ensure a slid fit. Note the bronze parts have a flat edge which goes downward, and the inner plate has a recess which faces the engine. use hylomar gasket sealant thin coat between parts, and rotate the crank pully the correct way as if you had inserted a pull cord into the lugs to start it, that way you can see which way the output shaft rotates, fit the impellor the correct way round (if old the lugs will be deformed slightly backwards from the centre, and ease on the bronze cover as the shaft is turning to ensure no lugs are damaged or folded the wrong way. Tighten the three bolts lightly by hand
rotate the crank as you fit the water pump cover.
Note above is 120 degrees wrong - the curved outlet pip should be pointing to Starboard not upwards
finally fit the connecter pipe ready for the exhaust, squeeze it fully down to make it easier later.
|
 .you
may find the flange taps off, or have to use a puller.
.you
may find the flange taps off, or have to use a puller.


| [Vire 7 Marine Engine] [How To] [Manuals] [FAQ] [Special Deals] [Contact] [Buy Parts] [Vire 12] |